Before going through documentation chapters, thanks for purchasing PrivateContent User Data add-on and trusting LCweb!
Need further help?
Need a customization?
On first plugin's activation, it must be activated in order to work.
Head to the LCweb Dashboard page: it contains the summary of all LCweb products with useful links and their validation forms.

LCweb Shop License:
Your license is automatically registered into the LCweb database, you only need to
- go to your licenses dashboard and select the section your product belongs to (if you own only one product, you will be automatically moved)
- Scroll down until you find the license you want to use for the website and click on the pencil button
- Insert the website domain and save. The system will give you the activation token
- Copy and paste it into the LCweb dashboard, on your website
Envato Marketplace License:
In this case you need to manually register on the LCweb Licenses Hub
- Go to the LCweb Licenses Hub and, if you never registered, do it. You will have to validate your e-mail and use a login token in order to enter.
- Once you are in, select the section your product belongs to (if you own only one product, you will be automatically moved)
- Scroll down until you find the product and click on the PLUS button. A form will prompt you to enter the Envato purchase code (how to get it?) and the website domain
- Once saved, the system will give you the activation token
- Copy and paste it into the LCweb dashboard, on your website
In case you have an intranet or localhost website (or your server is blocking external communications against the LCweb endpoint) you can use the offline activation.
Click on the related link (in the LCweb Dashboard) and fill in the form with the requested data: the offline token can be found following the steps listed above.
The add-on's core function is to create unlimited fields to store additional user data. You can create any field type except uploads, managed by Files Manager add-on
Date and time fields are displayed through modern HTML5 inputs. They auto-adpts to the browser settings, therefore, for example, you could see a 12h time field while you chose the 24h one. However the database value will always match your choice.
- Fields index
-
Each field index is unique and cannot be changed. If you delete a custom field also user's related data will be lost.
They follows worpress "sanitize title" scheme. Then can have only latin characters and dashes/underscores. - Single-option checkbox
-
It's a boolean selector. Then only yes/no option.
You can also choose to show it in disclaimers box: will be placed at the end of forms, detached from the rest. - Floating numbers subtype
-
Be careful with this: only english format is supported: with dot splitting decimals! (eg. 15.6 and not 15,6)
- Numeric ranges
-
By default values are allowed from 0 to 100. You can also use floating numbers to target a specific range.
- Custom regexp validation
-
This advanced method allows you to extend data validation using regular expressions. Will paass through PHP preg_match() function, use a valid format!
- Placeholder
-
Displays a default text on text and textarea fields. Is useful to help users fill in the form.
- Predefined choices (not for combo fields)
-
Starting from v3 you can now choose the default field value, just check the option you want to select
Starting from v3.0 User Data introduces combo fields: this means you will be able to load specific dropdown/checkbox options depending on another target dropdown/checkbox value.
- Composition type
-
By default a single value is asked and used for both option's value and label. You can also use the advanced mode, where is possible to differentiate them (eg. using IDs as values and related human-readable labels)
Every custom field can be displayed in users list.
Just use the "screen options" flap to toggle and sort them as you prefer!
Having many custom fields the user dashboard might become very crowded.
They can be spilt in sections, maintaining a gread usability and rationality.
Fields can be arranged also in the Fileds Builder page.
Because of the conditional fields engine, the User Data add-on unifies the form builder for both Registration and Data-update forms. Data-update forms are meant to let already registered users to edit/add data. This means they WILL NOT be visible by unlogged users.
What does "conditional" mean? You are able to toggle fields/texts visibility basing on other user field values.
Everything in real time!
To know how to insert the forms into your pages, please check the following "shortcodes" chapter.
- Custom Message
-
Allows you to override the default message in case of successfull form submission
- Form redirect
-
Allows you to set a page/url where users will be redirected once form has been successfully filled and data saved
- Conditional fields targeting user categories, Premium Plans add-on plans or "value+labels" options-based fields
-
Remember that the conditional fields engine targets the real field value, not what is seen in the form dropdown. Then you must user the user category ID, or the subscription plan ID or the field option value in the "match value" field.
- Conditional fields targeting disclaimer or a single checkbox fields
-
In these cases, the "matching value" to use is "1"
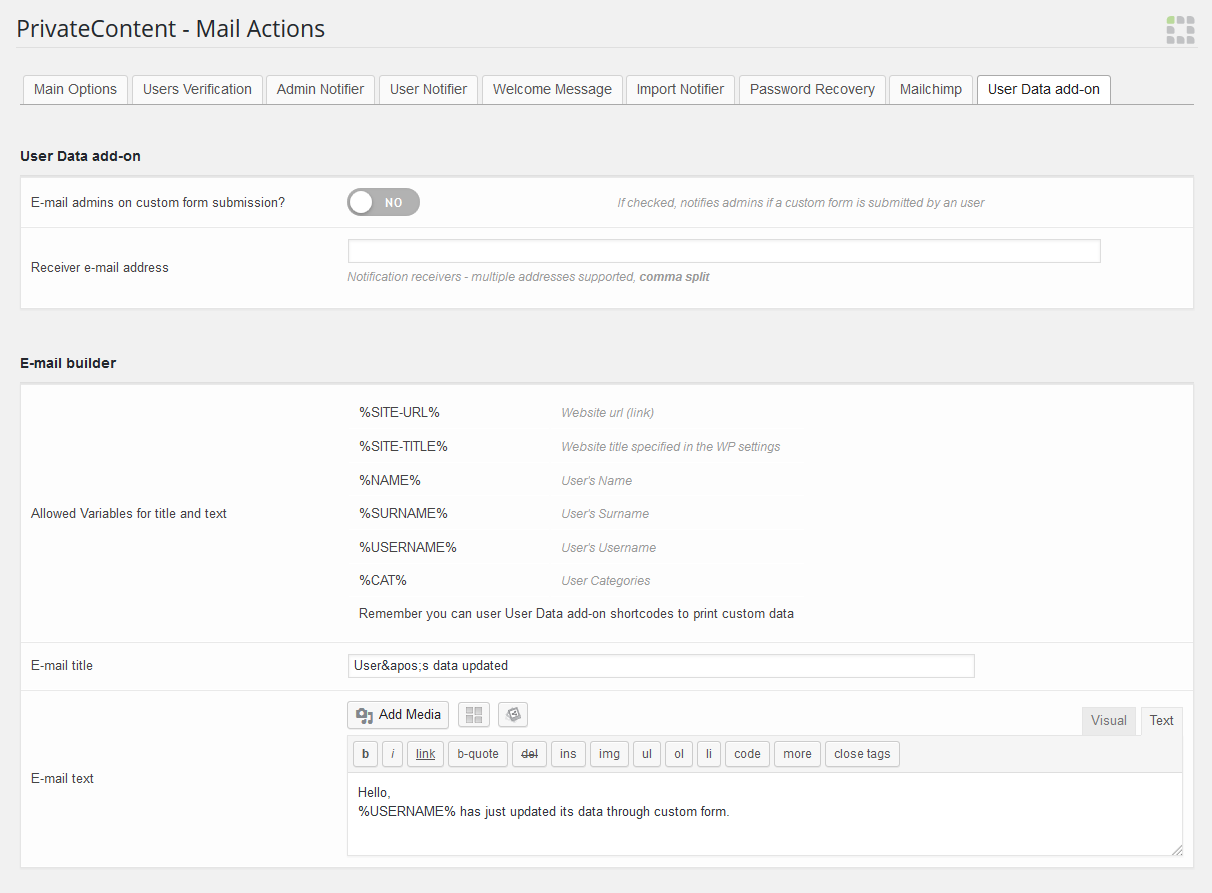
- Admin notification (requires Mail Actions add-on)
-
User Data add-on integrates with another LCweb's add-on, Mail Actions. Going into its settings panel you'll be able to enable this notification system.
Basically you can inform admins when an user updates its data.
This add-on is natively integrated with with WordPress Block Editor (Gutenberg), Visual Composer, Elementor and Divi Builder.
Using them, you can skip the standard shortcode wizard and use the related PrivateContent tool.
For any other builder or using the old WordPress editor just open the PrivateContent shortcode wizard and select "PCUD - User's Data" or "PCUD - Data-update Form" or "PCUD - Conditional Block" from the shortcode's dropdown list.
Select the view you want to show and click on "insert".
Simply displays the logged user's data related to the chosen field. Displayed data is already managed to be human-readable.
[pcud-user-data f="username" is_wp_meta="0"]| f | the field ID (not its name) |
|---|---|
| is_wp_meta | Setting it to "1", the shortcode will search among synced WP user metas. Clearly usable for WP user synced users |
Displays the chosen data-update form, remember it is uniquely visible and usable by logged users! WordPress admins will be able to fill the form to test it, but no data will be saved.
[pcud-form form="5" layout="fluid" align="center"]| form | the data-update form ID (hover the form name in the builder's list to know it) |
|---|---|
| layout | set form layout between one_col and fluid (by default is used what set in settings) (optional parameter) |
| align | defines form alignment. Possible values: center, left, right (optional parameter) |
Selectively show/hide contents basing on a logged user's field value. For example you can show contents only to customers having filled a field or having the ".com" domain in their e-mails.
[pcud-cond-block f="email" cond="like" val=".com" is_wp_meta="0"]... contents ...[/pcud-cond-block] | f | the field ID (not its name) |
|---|---|
| cond | condition operator. Available values (comma split in this legend): = , != , big , small , like |
| value | condition value |
| is_wp_meta | Setting it to "1", the shortcode will search among synced WP user metas. Clearly usable for WP user synced users |
Remember that "greater" and "lower" condition only work with numeric data. While "contains" will search for at least a correspondance in user's data
You can force users to reset their passwords. This is an extra security and privacy measure.
In PrivateContent settings (main tab), there are two new fields.
First one defines the top warning text and the second one requires Mail Actions add-on and defines whether to force users having requested a password reset.
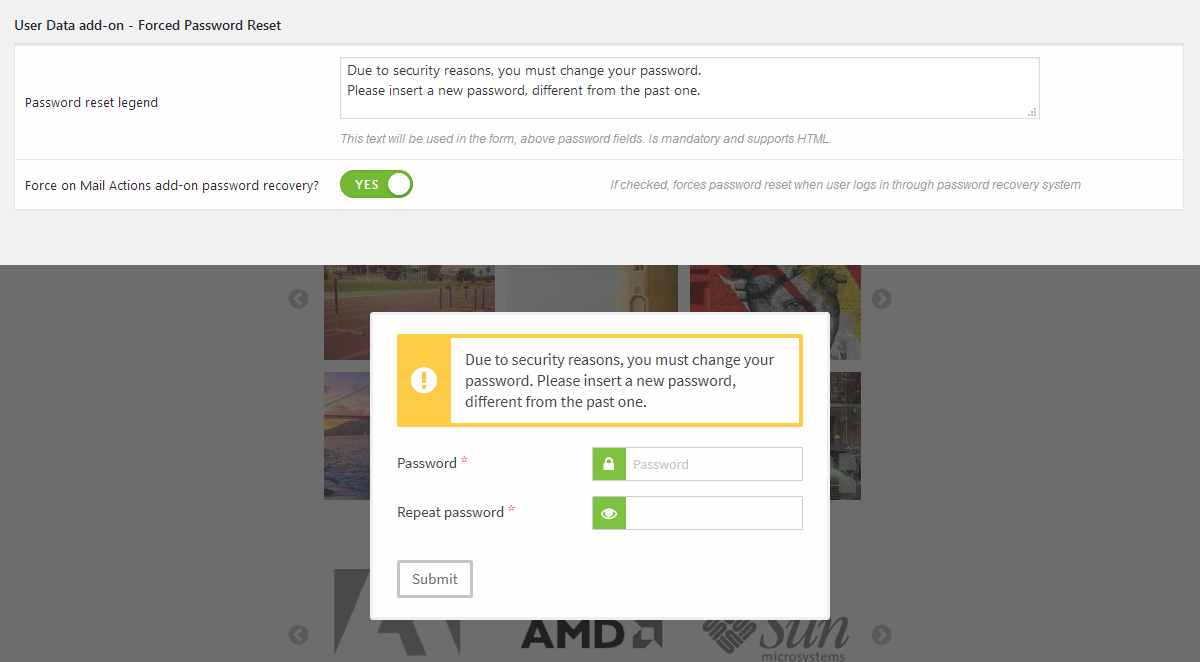
You will be able to enable the system in "edit user" page and use it during users import.
Users forced to update their passwords will be promped by a modal lightbox in every website's page.
They can't navigate on the website unless they perform the reset.
The plugin is 100% multilanguage for both front and back ends. If a translation of your language has been created, WordPress will automatically switch between languages.
Plus it is compatible with WPML, Polylang and qTranslate!
How to create a translation
If you have WPML + String Translation add-on or Polylang, you can simply scan the plugin and translate strings via its UI.
Otherwise: go in the plugin folder, you'll find a folder called "languages".
Inside you'll find the default.pot file. It contains english strings to be translated.
If you want to create or customize your language translation, follow these steps:
- Open the default.pot file with POedit
- Edit the catalog by inserting your data and setting translation's language
- Save the file with your language's i18n identifier and "pcud_ml-" prefix (the italian example is pcud_ml-it_IT)
- Go to the plugin folder ".. wp-content/plugins/private-content/languages" and paste and paste resulting .PO and .MO files
If you create new translations, please contact me at [email protected] sending your .PO and .MO files.
Otherwise they will be lost in next updates. Thanks!