Before going through documentation chapters, thanks for purchasing Global Gallery and trusting LCweb!
Need further help?
Need a customization?
On first plugin's activation, it must be activated in order to work.
Head to the LCweb Dashboard page: it contains the summary of all LCweb products with useful links and their validation forms.

LCweb Shop License:
Your license is automatically registered into the LCweb database, you only need to
- go to your licenses dashboard and select the section your product belongs to (if you own only one product, you will be automatically moved)
- Scroll down until you find the license you want to use for the website and click on the pencil button
- Insert the website domain and save. The system will give you the activation token
- Copy and paste it into the LCweb dashboard, on your website
Envato Marketplace License:
In this case you need to manually register on the LCweb Licenses Hub
- Go to the LCweb Licenses Hub and, if you never registered, do it. You will have to validate your e-mail and use a login token in order to enter.
- Once you are in, select the section your product belongs to (if you own only one product, you will be automatically moved)
- Scroll down until you find the product and click on the PLUS button. A form will prompt you to enter the Envato purchase code (how to get it?) and the website domain
- Once saved, the system will give you the activation token
- Copy and paste it into the LCweb dashboard, on your website
In case you have an intranet or localhost website (or your server is blocking external communications against the LCweb endpoint) you can use the offline activation.
Click on the related link (in the LCweb Dashboard) and fill in the form with the requested data: the offline token can be found following the steps listed above.
The first step in order to use the plugin is check and save settings.
They are arranged and split to be as easy as possible to be configured. Each field has got its description giving contextual help.
The most important thing is to be sure plugin is ready to create thubmnails.
In first settings tab, last section is about Easy WP Thumbs status. Facing issues, please check the related FAQ
Various parts are going to be analysed through this documentation chapters.
On the very first installation there are three essential parts to check:
- Elements maximum width
-
Is the variable used to calculate thumbnail sizes. Is important to set it properly, using the real maximum width where you're gonna place Global Gallery elements.
To avoid huge images by default it is set to 1200 pixels, but if you are using (for example) a fullwidth template, the proper value will be 1920px. - Layouts Section
-
Here you setup global gallery shapes for every layout. Image sizes can be changed individually (in gallery builder) while margins are fixed.
Is also important to understand how percentage height works (eg. for collection image): it is always referred to images width.
For example if they are 200px wide and you set an height of 50%, resulting images will be 100px high - Styling Section
-
It controls everything about galleries aspect: from overlays to filters.
You can take advantage of the 8 preset styles though: using them you'll override every styling option.
Additional Notes
- Use thumbnails on admin side?
-
Global Gallery, by default, disables thumbnails on admin panel. This to avoid server overloads, specially on large galleries.
Enable it if your server is powerful or using few images per gallery. - Use javascript in website's head?
-
Use this only if you are noticing some incompatibility
- RTL mode?
-
Option to be used on RTL websites (for example hebrew ones)

Before creating galleries you may create categories to be assigned later.
They are optional and used by gallery collections.
This chapter is required only if you plan to use Global Gallery album source.
This is a files manager directly connected with your server folders. A quick and clean alternative to FTP usage in order to use Global Gallery albums source. As first, the base folder must be defined.
NB: only site administrators will be able to configure it for security reasons
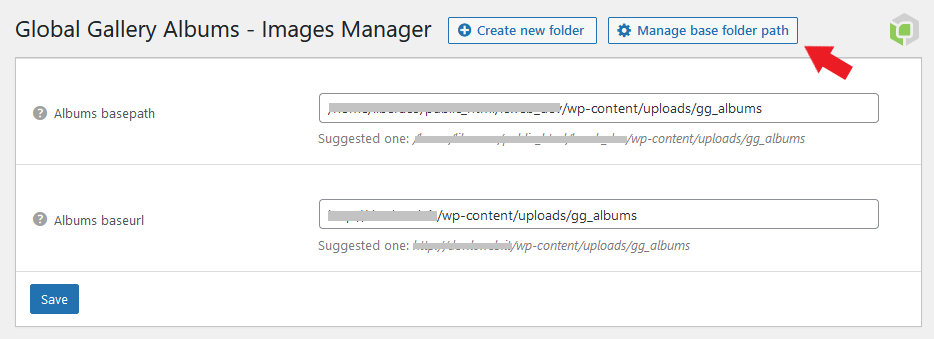
The suggested (and auto-configured) path is a specific folder within wp-content/uploads WordPress directory.
Subfolders and images will be uploaded in there.
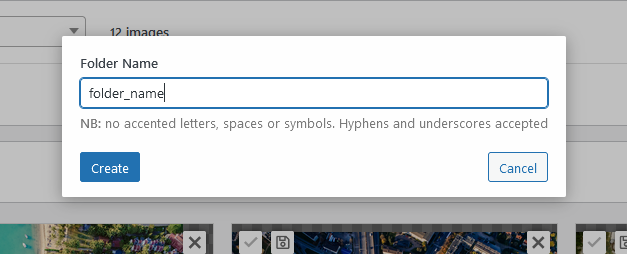
Once the system is ready, you need to create subfolders, that will represent galleries.
Folders name must be server-proof. This means you must use only letters, numbers, hyphens and underscores.
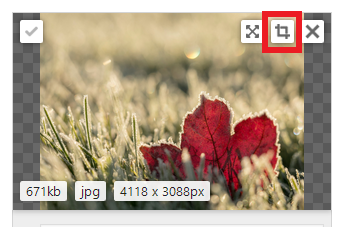
Therefore select the folder you want to operate on and just upload your images by clicking the "upload images" button or dragging them on the screen.
The engine is able to read IPTC meta tags. The tags scheme is set on globally used fields (for example, what Photoshop and Lightroom use). There is no database, everything you see and edit is directly reflected on the physical server file. This means you can also use a third part automated FTP system to upload images in a specific folder and use this files manager to add/edit/remove images data.
Please note IPTC meta data can be managed only on JPG images and your server/hosting must allow getimagezize()
Before starting to build your galleries, worth to take a moment to plan which is the best source for your needs.
WP media library is surely the most immediate option, but has got several downsides: to have many images in the library floods your database and your server. It's slower on frontend and prevents a hypothetical gallery export/import.
Dropbox, Amazon S3 and Google Drive are good options, but they are all prone to third-party APIs. As it happened in the past, if a company changes policy, the gallery could suddently stop working.
Unless you have serious space limits on your server, the best option is always to use Global Gallery Albums.
In the following sub-chapters you will learn how to create galleries using various sources.
There are some common notes applying globally:
- Desktop-like images selection
-
Remember you can bulk-select multiple images simply keeping the mouse clicked. As you'd do on your desktop
- Thumbnails center
-
Every image added to the gallery has got a command to set its thumbnail's center
- Easy-sorting mode
-
Sorting images could be a pain, specially if you have large galleries.
In builder's right column there's the "Easy sorting mode" button, changing builder's layout to be easier sorted. - Images link
-
You can turn gallery images in links. Linked images won't be opened in lightboxes.
Links behavior is set globally, in settings.
- Images frontend sorting
-
Is also possible to set a custom sorting for frontend images sorting.
Please note date sorting is available only for WP-based sources since bases onn images ID.
- Gallery preview
- Gallery must be saved before checking its preview
It's the default source, simply listing WP Media Library images.
Be careful to not delete images added to galleries or they won't load anymore!
It's surely the most direct way of creating a gallery but in most cases it's not the best options.
Often media library contains a lot of mixed site images then could be hard to find what you are searching for quickly.
This source requires you to select a posts category.
Images will be fetched from posts belonging to that category
Similar to WP category, this source will scan your WP installation for taxonomies belonging to custom post types.
A good example are WooCommerce product categories.
To use this source, you must have configured the images manager.
Just choose the folder you want to fetch images from and compose the gallery.
Before connecting to your Dropbox you must:
- Create a folder IN ROOT named "globalgallery"
- Create subfolders (albums) and upload images. Subfolders name is totally up to you
Then:
- Click on manage connections, then on "add connection"
- Insert a name to identify the connection and your Dropbox username (typically an e-mail address)
- Click on "Get your Dropbox token" and authorize the app
-
You will be moved to LCweb website, where a splash screen will highlight your token and let you copy it
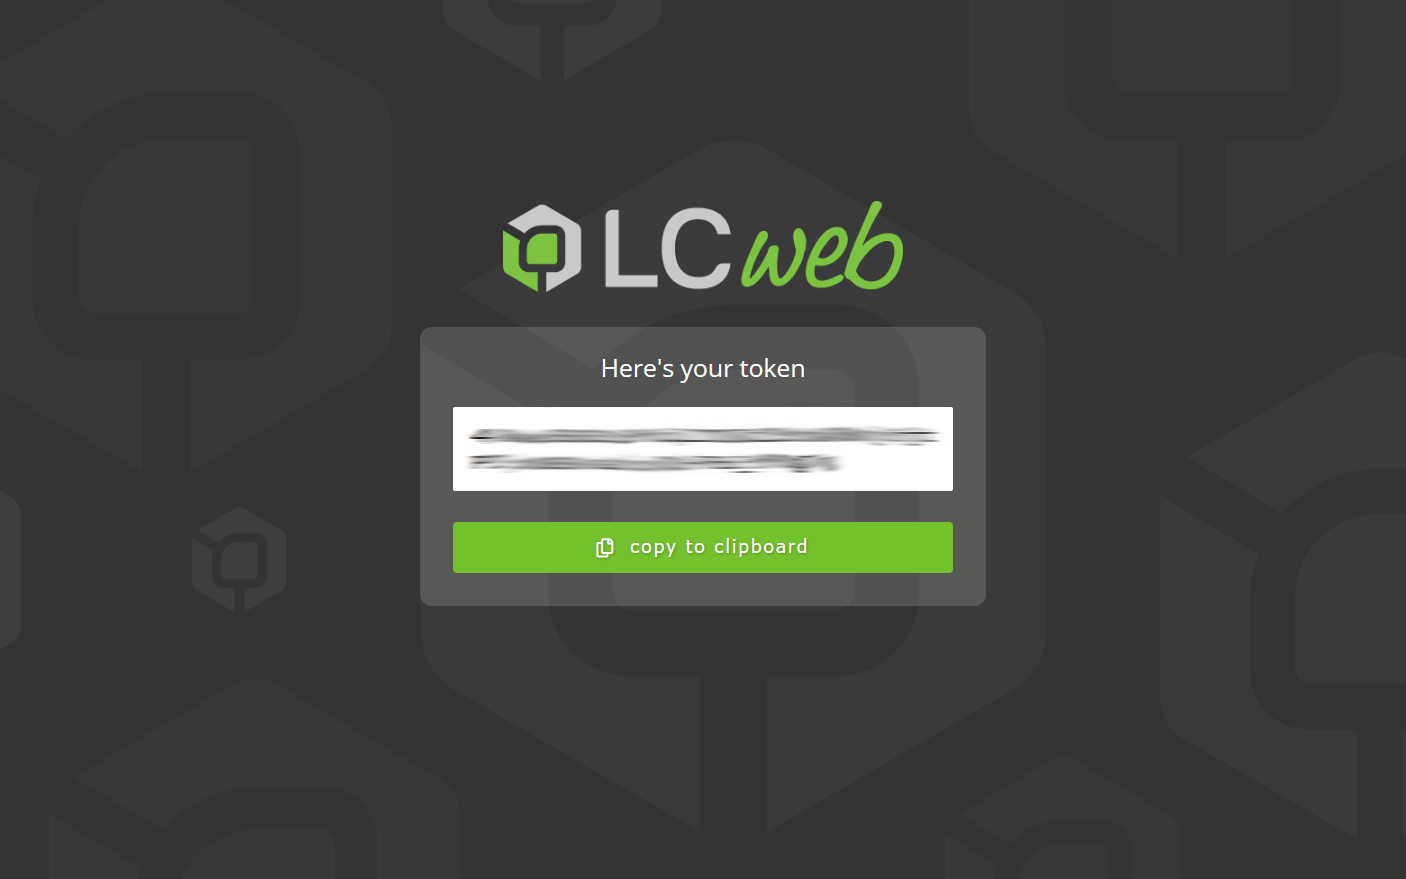
- Paste it in the related Global Gallery field and click on "submit"
- Connections dropdown will be reloaded and you will be able to select your newly created connection
On the very first connection, the system needs to create a public link for each image. Be careful loading many new images at once, the connection might take a while.
The connetion will require a properly configure AWS S3 bucket, containing your galleries:
It's essential to make it public and to use this bucket policy
{
    "Version": "2012-10-17",
    "Statement": [
        {
            "Sid": "PublicReadGetObject",
            "Effect": "Allow",
            "Principal": "*",
            "Action": "s3:GetObject",
            "Resource": "arn:aws:s3:::THE-BUCKET-NAME/*"
        },
        {
            "Sid": "ListObjectsInBucket",
            "Effect": "Allow",
            "Principal": "*",
            "Action": "s3:ListBucket",
            "Resource": "arn:aws:s3:::THE-BUCKET-NAME"
        }
    ]
}
Once your bucket is ready and contains at least a folder with images:
- In Global Gallery select "Amazon AWS (S3)" as images source
- Click on manage connections, then on "add connection"
- Insert a name to identify the connection and the bucket name
- Insert the bucket region (for the bucket created in the previous video it's "eu-north-1")
- Click on "submit" to test the connection and save
- Connections dropdown will be reloaded and you will be able to select your newly created connection
Actually the plugin can fetch PUBLIC images.
There are multiple integrations:
| Subject | Example |
|---|---|
| user's set/album URL | https://www.flickr.com/photos/lucastrings/albums/72157629032261075/ |
| user's photostream URL | https://www.flickr.com/photos/lucastrings/ |
| tag URL | https://www.flickr.com/photos/tags/landscape/ |
Simply insert the board URL you want to fetch images from (eg. https://www.pinterest.it/dribbble/animation-inspiration/)
Unfortunately Pinterest returns only last 50 images. To create larger galleries, use the auto-population system
Google Drive source requires PHP 8.0.2 or later
Before connecting to your Drive you must:
- Create a folder IN ROOT named "globalgallery"
- Create subfolders (albums) and upload images. Subfolders name is totally up to you
- (IMPORANT) Use right click on every folder and element to set them public
Then:
- Click on manage connections, then on "add connection"
- Insert a name to identify the connection and your Google username (typically a Gmail e-mail address. The one you use for Gmail for example)
- Click on "Get your Google Drive token" and authorize the app
-
You will be moved to LCweb website, where a splash screen will highlight your token and let you copy it
- Paste it in the related Global Gallery field and click on "submit"
- Connections dropdown will be reloaded and you will be able to select your newly created connection
Google is making things difficult to approve a specific API usage for Global Gallery.
The process is literally taking months. Please do not be worried about the Google alert while approving the Global Gallery app: click on the little "advanced" text in left-bottom corner and then "Open LCweb Global Gallery"
Just use the tumblr's website URL
Global Gallery integrates with Real Media Library plugin.
- The plugin must be installed and you must have at least one folder
- Select it as gallery source
- Select the folder you want to use as source
Global Gallery integrates with NextGEN Gallery plugin.
- The plugin must be installed and you must have at least one gallery
- Select it as gallery source
- Select the gallery you want to use as source
Just insert the RSS URL.
RSS structure must be valid to be properly handled.
As side-suggestion, you can use this source to fetch Facebook and Instagram images. This thanks to Zapier.
You can connect your Instagram and Facebook accounts to dynamically create a RSS feed every time a new content is published.
Each gallery image can be tagged: insert comma split tags in the related field and they will be used to setup a filtering system.
Please note this feature is not available for auto-populated galleries, since requires a manual immission.
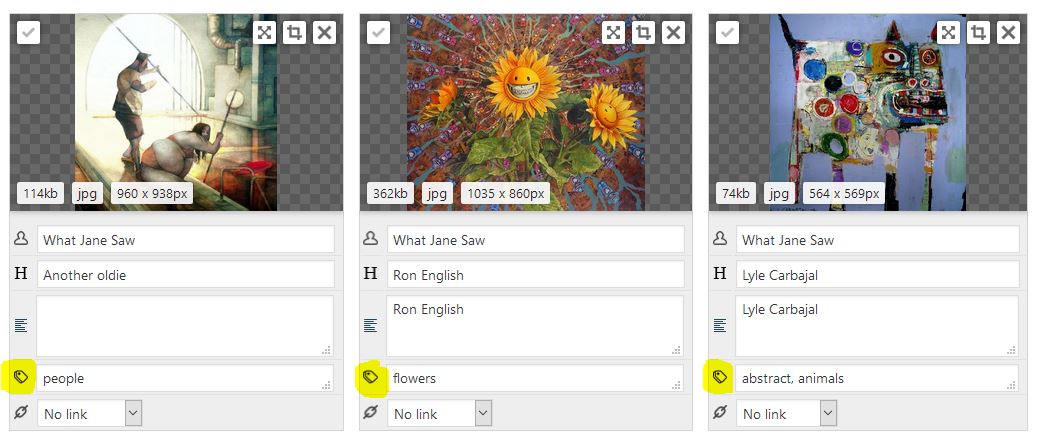
Once saved, be sure to have filters enabled in the Gallery Shortcode (check the related documentation's chapter to know more) and you will see those tags grouped and appearing on top of the gallery images.
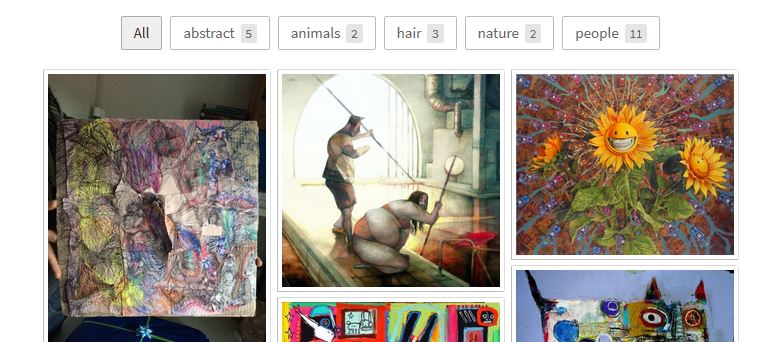
There are several tag aspects that can be managed in plugin settings: for example their sorting method or whether to show matched images count or also whether to ignore tags matching very few images (to avoid too many tag buttons).
You can wrap existing galleries into collections: a smart and quick way to group and filter them in a unique context.
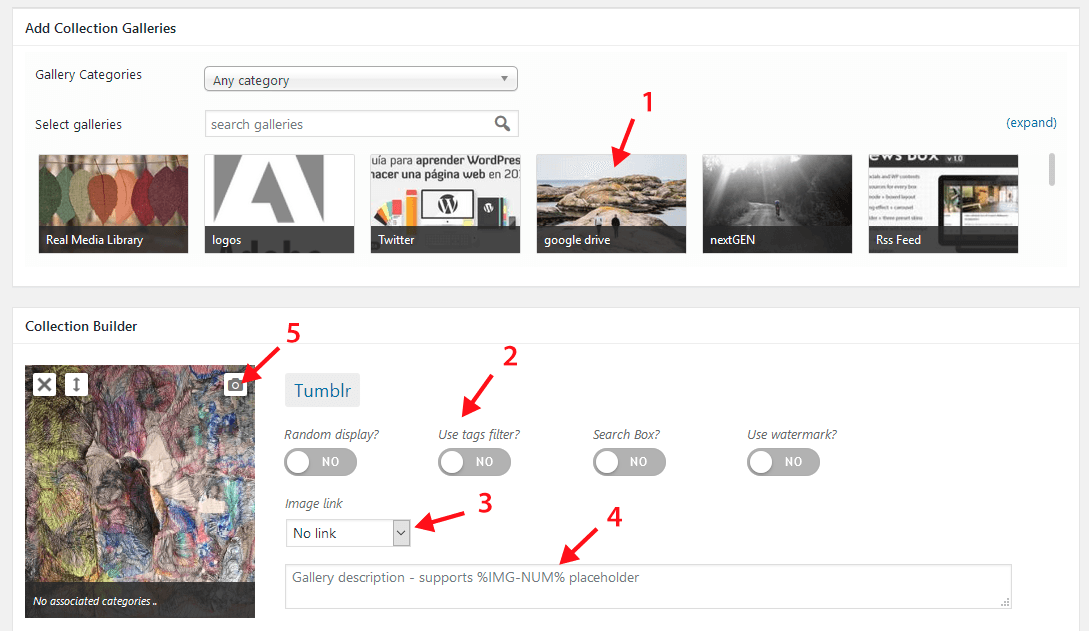
- Click on a gallery image to add it to the collection
- You can optionally set it to have random images, display tags, search bar or also show watermarked images
- Optionally you may also link the gallery thumbnail. Obviously linked galleries won't bring to their images
- Also description is optional. It may contain HTML and the %IMG-NUM% placeholder, showing gallery images count
- By default the collection shows the first gallery image on its intial state. However you can also set a custom picture to represent the gallery
Global Gallery offers you many lightboxes to display your images with.
Into settings, there's a specific tab to choose the one to be used and, accordingly to your choice, customization fields will be shown.
Lightboxes list:
LC Lightbox Comments
Supported systems are Disqus and Facebook Comments
Disqus
Integration is really simple: just insert the shortname. Style, moderation and details are managed directly on Disqus
Facebook Comments
This requires multiple steps and more skills:
- create a new app and paste its ID into the related field
- Global Gallery inserts the Facebook meta into the website to link comments to your app
- before launching comments, be sure to have set moderators here clicking on "settings"
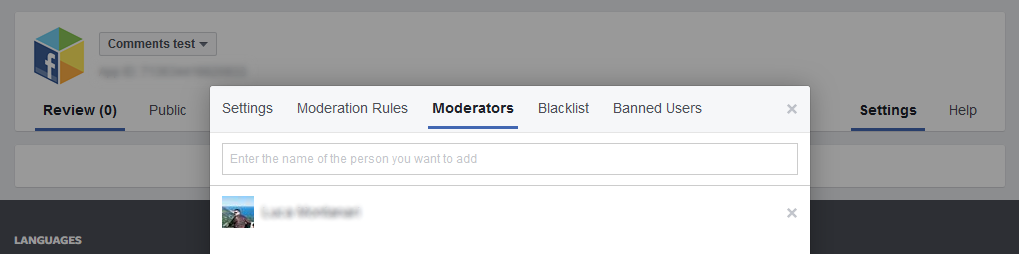
- If everything is ok, moderators will see the moderation label on top of comments form and you will receive notifications through the app
Global Gallery is also natively integrated with WordPress Block Editor (Gutenberg), Elementor, Visual Composer and Divi Builder.
Using them you can skip the standard shortcode wizard and use the related plugin's tool.
For any other builder or using the old WordPress editor:
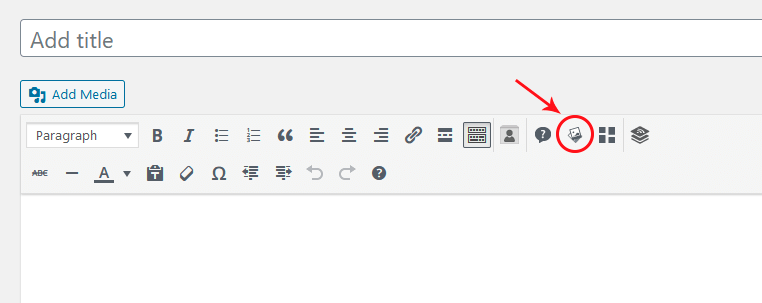
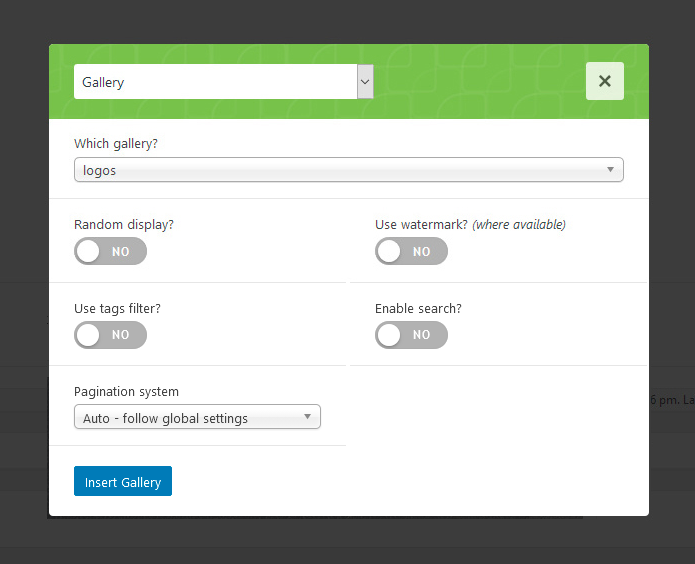
Choose the gallery you want to use and click on "Insert Gallery".
Here's a demo shortcode with all possible parameters and default values:
[g-gallery
    gid="5"
    random="0"
    watermark="0"
    filters="0"
    search="0"
    pagination="1"
] 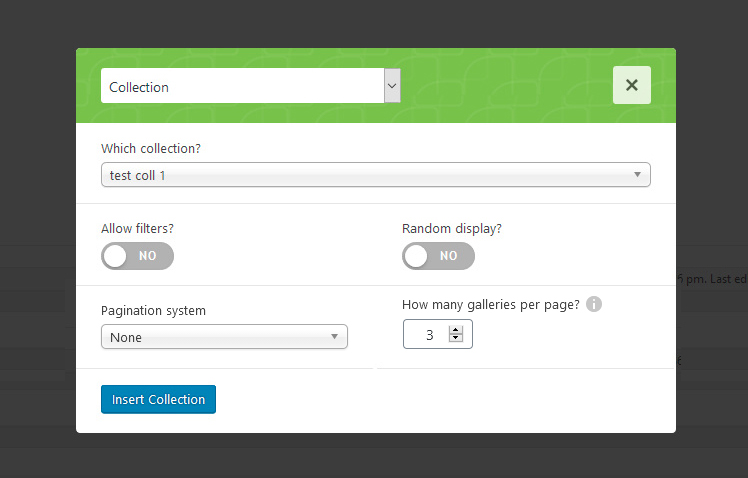
Choose the collection you want to use and click on "Insert Collection"
Actually collection's pagination is detached from deeplink engine.
It will be also ignored by collection's category filter
Here's a demo shortcode with all possible parameters and default values:
[g-collection
    cid="5"
    random="0"
    filter="0"
    def_filter="0"
    hide_all_filter="0"
    pag_sys=""
    per_page="0"
]
This is a special shortcode showing a small image box, launching an entire gallery.
Before explaining how to insert it into your website would be better to understand how you can manage texts over shown images. Here are system-related options in settings page:

You can use a mix of
- Plain text
- HTML (then any FontAwesome icon)
- Two special placeholders: %IMG-NUM% (showing gallery images count) and %GALL-TITLE% (showing gallery's title)
Once you understood this point, click on Global Gallery shortcode's wizard (explained in the related chapter) and select "image-to-gllery" from the dropdown.
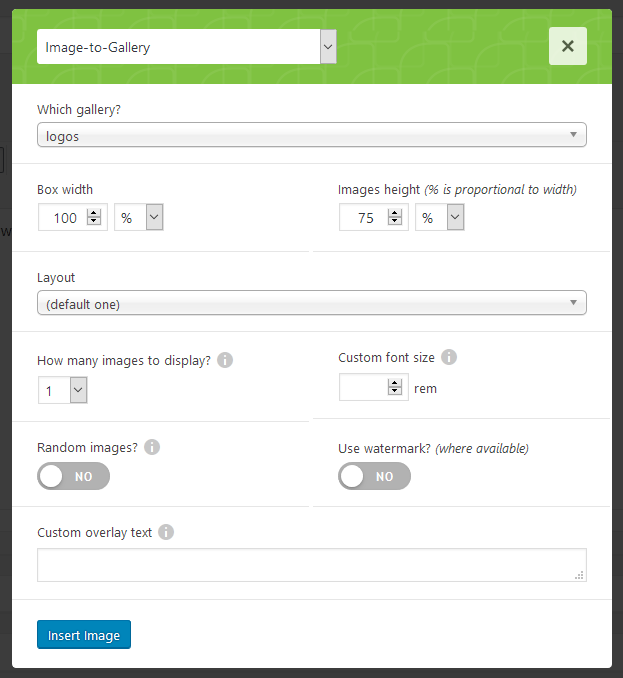
Here's a demo shortcode with all possible parameters and default values:
[g-itg
    gid="5"
    width="100%"
    img_h="75%"
    layout=""
    img_num="1"
    font_size="0"
    random="0"
    watermark="0"
][/g-itg]
- How many images to display?
-
Determines how many gallery images to show. The selected layout will be applied adapting to this number with only one exception:
"Main image with central overlay + two smaller on sides" layout will always show 3 images. - Images Width
-
This depends on "Box Width" and "How many imaegs" parameter. In fact, showing more than one image, they will be placed on two columns.
Then showing two images and setting a box width of 300px, you will have two 150px images. - Percentage Images Height
-
It is always referred to images width ans is useful to maintain the same aspect ratio also on small screens.
For example if your images are 300px wide and you set an height of 50%, they will be 150px high. - Custom overlay text
-
Here you can set a custom text for this specific implementation.
Supports everything has been explained before (text + HTM + placeholders)
Before explaining how to insert a slider, is important to check its settings: there you can manage global behaviors and how slider will look.
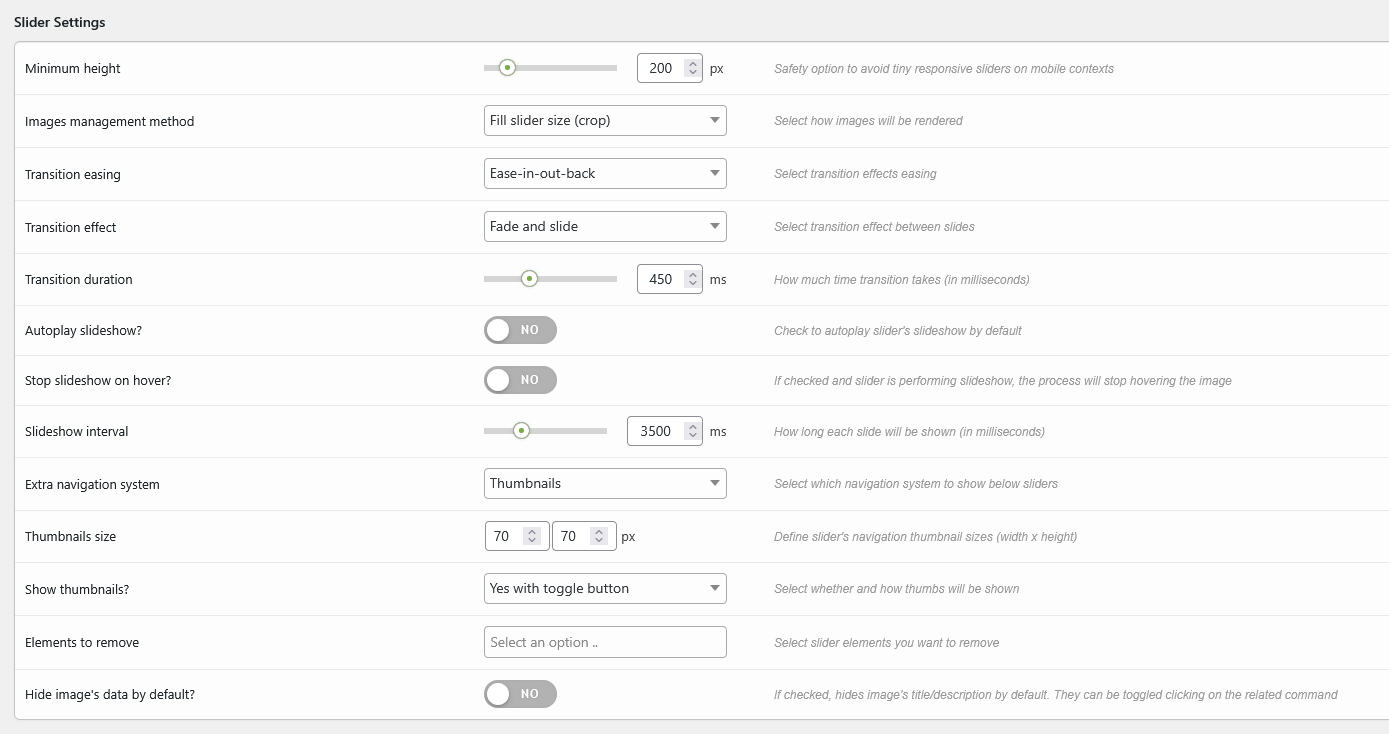
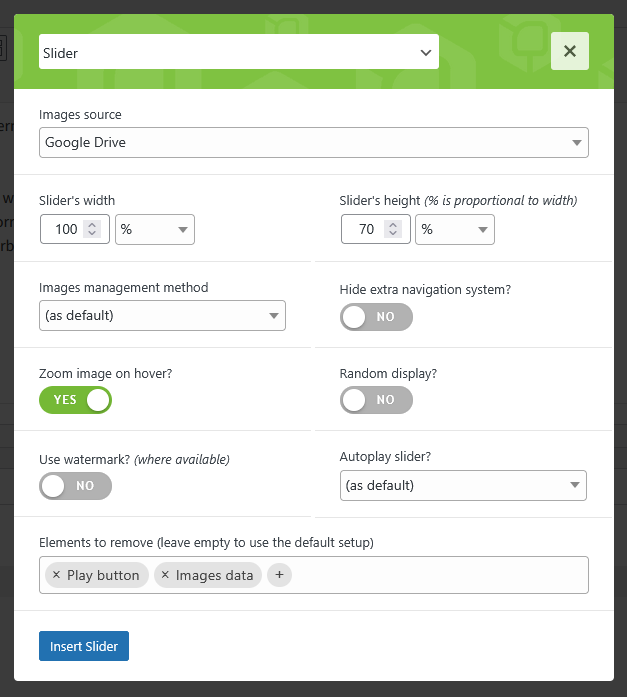
Once everything's ok, click on Global Gallery shortcode's wizard and select "slider" from the dropdown.
Then just insert it chosing how you prefer it to be shaped.
Just a quick note about slider's height: percentage value is always referred to slider width.
Useful to maintain the same aspect ratio also on small screens.
For example if you set an height of 50% and slider is 1000px wide, it will be 500px high.
Here's a demo shortcode with all possible parameters and default values:
[g-slider
    gid="5"
    width="100%"
    height="55%"
    crop_method="auto"
    no_extra_nav="0"
    zoom_on_hover="0"
    random="0"
    watermark="0"
    autoplay="auto"
    hidden_elems=""
]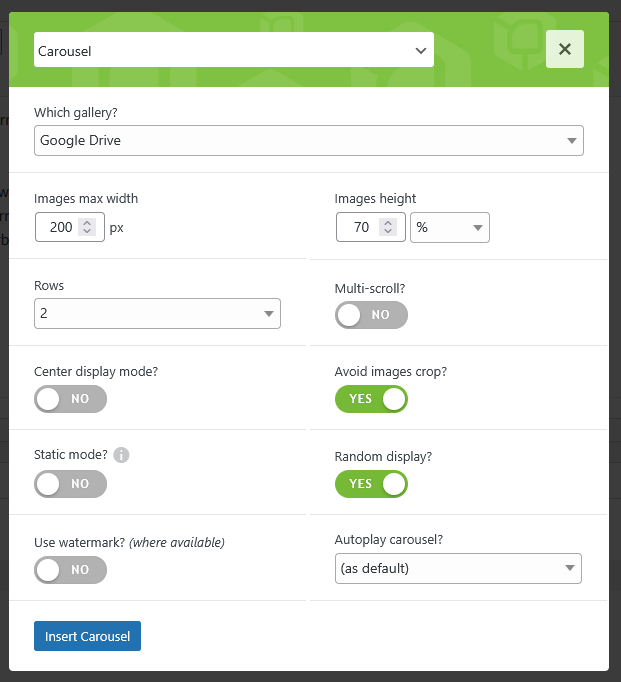
Here's a demo shortcode with all possible parameters and default values:
[g-carousel
    gid="5"
    img_max_w="180"
    height="200"
    h_type="px"
    rows="1"
    multiscroll="0"
    center="0"
    nocrop="0"
    static="0"
    random="0"
    watermark="0"
    autoplay="auto"
    overlay="default"
]- New sizing system
-
Starting from v6, Global Gallery introduces an improved sizing system for carousels.
If you already have carousels into your site, would be good to create again their shortcodes with new parameters.It works defining a maximum images width. Let's make an example setting a value of 200px:
- (desktop case) if carousel's wrapper is 1000px wide, resulting carousel will have 5 columns
- (mobile case) wrapper is 600px wide, carousel will decrease to 3 columns
and so on!
- Responsive height
- Since v6 you can set a percentage value for images height: it is always referred to images width.
For example if they are 200px wide and you set an height of 50%, resulting images will be 100px high. - Multi-scroll
- Will slide multiple images per time. Is not effective if you are using "center" mode
- Avoid images crop?
- This option allows you to show images without cropping them. This is really useful for example to create logo carousels
The watermarking process is quite heavy and creates an exact copy of the original image on your server. Be careful using it on weak servers or having few available memory.
It also requires direct read/write permissions on your server: be sure to not have restrictions set by your hoster. Watermarked images will be cached in ../wp-contents/uploads/gg_watermarked
In plugin settings you find a related tab where to setup watermark:

A quick note about proportional sizing: if checked, watermark size will be adjusted to matched the image to affect.
For example if image is 1000x1000 pixels and you set a proportional image of 15% x 15%, the watermark will be 150x150 pixels.
Is extremely useful to avoid bad results using images having various aspect ratios and sizes.
Once setup you will be able to use the watermark option in shortcodes.
However is strictly recommended to create the watermark cache for the gallery we're going to use.
In fact, in every gallery builder, there's a big button to do so. In the right sidebar

Global Gallery can create an XML sitemap containing your gallery images.
Don't know what a sitemap is? Essentially you can use it to push images URL and data directly to search engines, in order to have them indexed faster. Here's a Google guide.
The sitemap URL is written into plugin settings > Main Options > first section. Generally is:
THE-SITE-URL/wp-content/plugins/global-gallery/galleries_xml_sitemap.php
It will be populated by galleries using self-hosted images (eg. WP library, NextGen, local folders).
Search engines will only accept contents coming from your site URL.
There's only a requirement: you must fill the "Page URL for Sitemap" in each gallery builder (right sidebar).
It is mandatory in order to suggest to search engines where images can be found.
The plugin is 100% multilanguage for both front and back ends. If a translation of your language has been created, WordPress will automatically switch between languages.
How to create a translation
If you have WPML + String Translation add-on or Polylang, you can simply scan the plugin and translate strings via its UI.
Otherwise: go in the plugin folder, then open the one named "languages" or "lang_admin".
Inside you'll find the default.pot file. It contains english strings to be translated.
If you want to create or customize one your language translation, follow these steps:
- Open the default.pot file with POedit
- Edit the catalog by inserting your data and setting translation's language
- Save the file with your language's i18n identifier and "gg_ml-" prefix (the italian example is gg_ml-it_IT)
- Go to plugin's folder ".. wp-content/plugins/global-gallery/languages" or ".. wp-content/plugins/global-gallery/lang_admin" and paste resulting .PO and .MO files
If you create new translations, please contact me at [email protected] sending your .PO and .MO files.
Otherwise they will be lost in next updates. Thanks!
Tips on how to use WPML/Polylang
The plugin is natively integrated into them to allow you an easy multilanguage website setup even on complex structures like galleries and collections.
Galleries
- Create the gallery in the language you prefer
- Create the translation by cloning it
- Detach the translation from the original language and edit the texts
Collections
- Compose them using the galleries in the language you prefer
- Galleries language will be automatically converted on frontend
- To translate galleries description and custom links you need Polylang or WPML String Translations add-on